
New Products
-
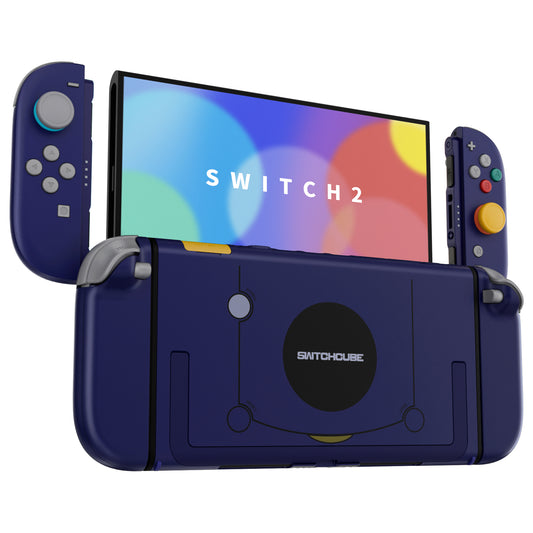
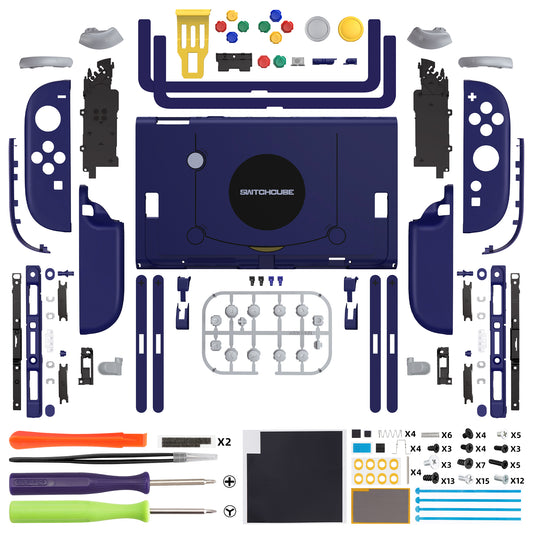
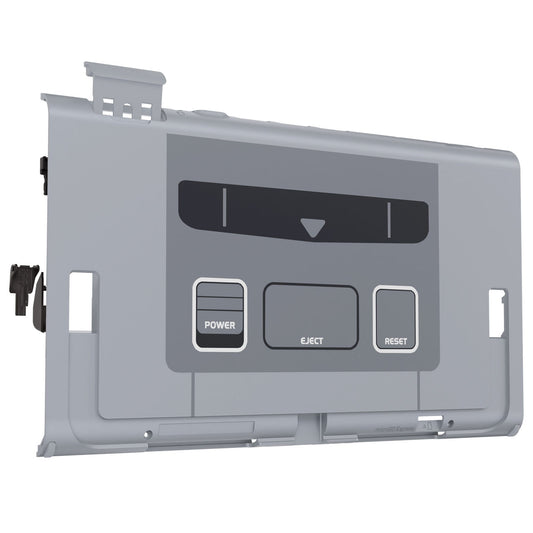
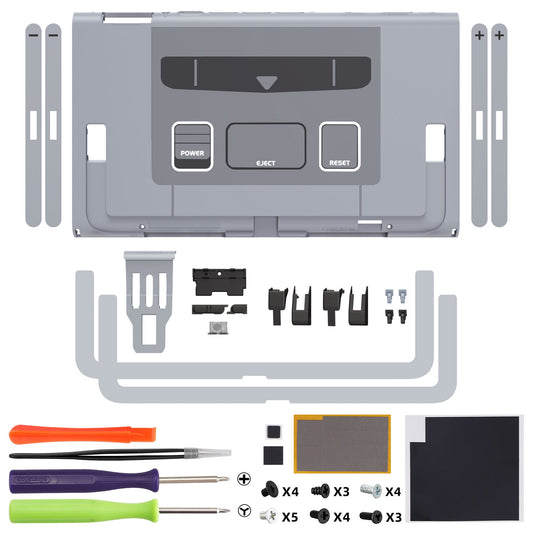
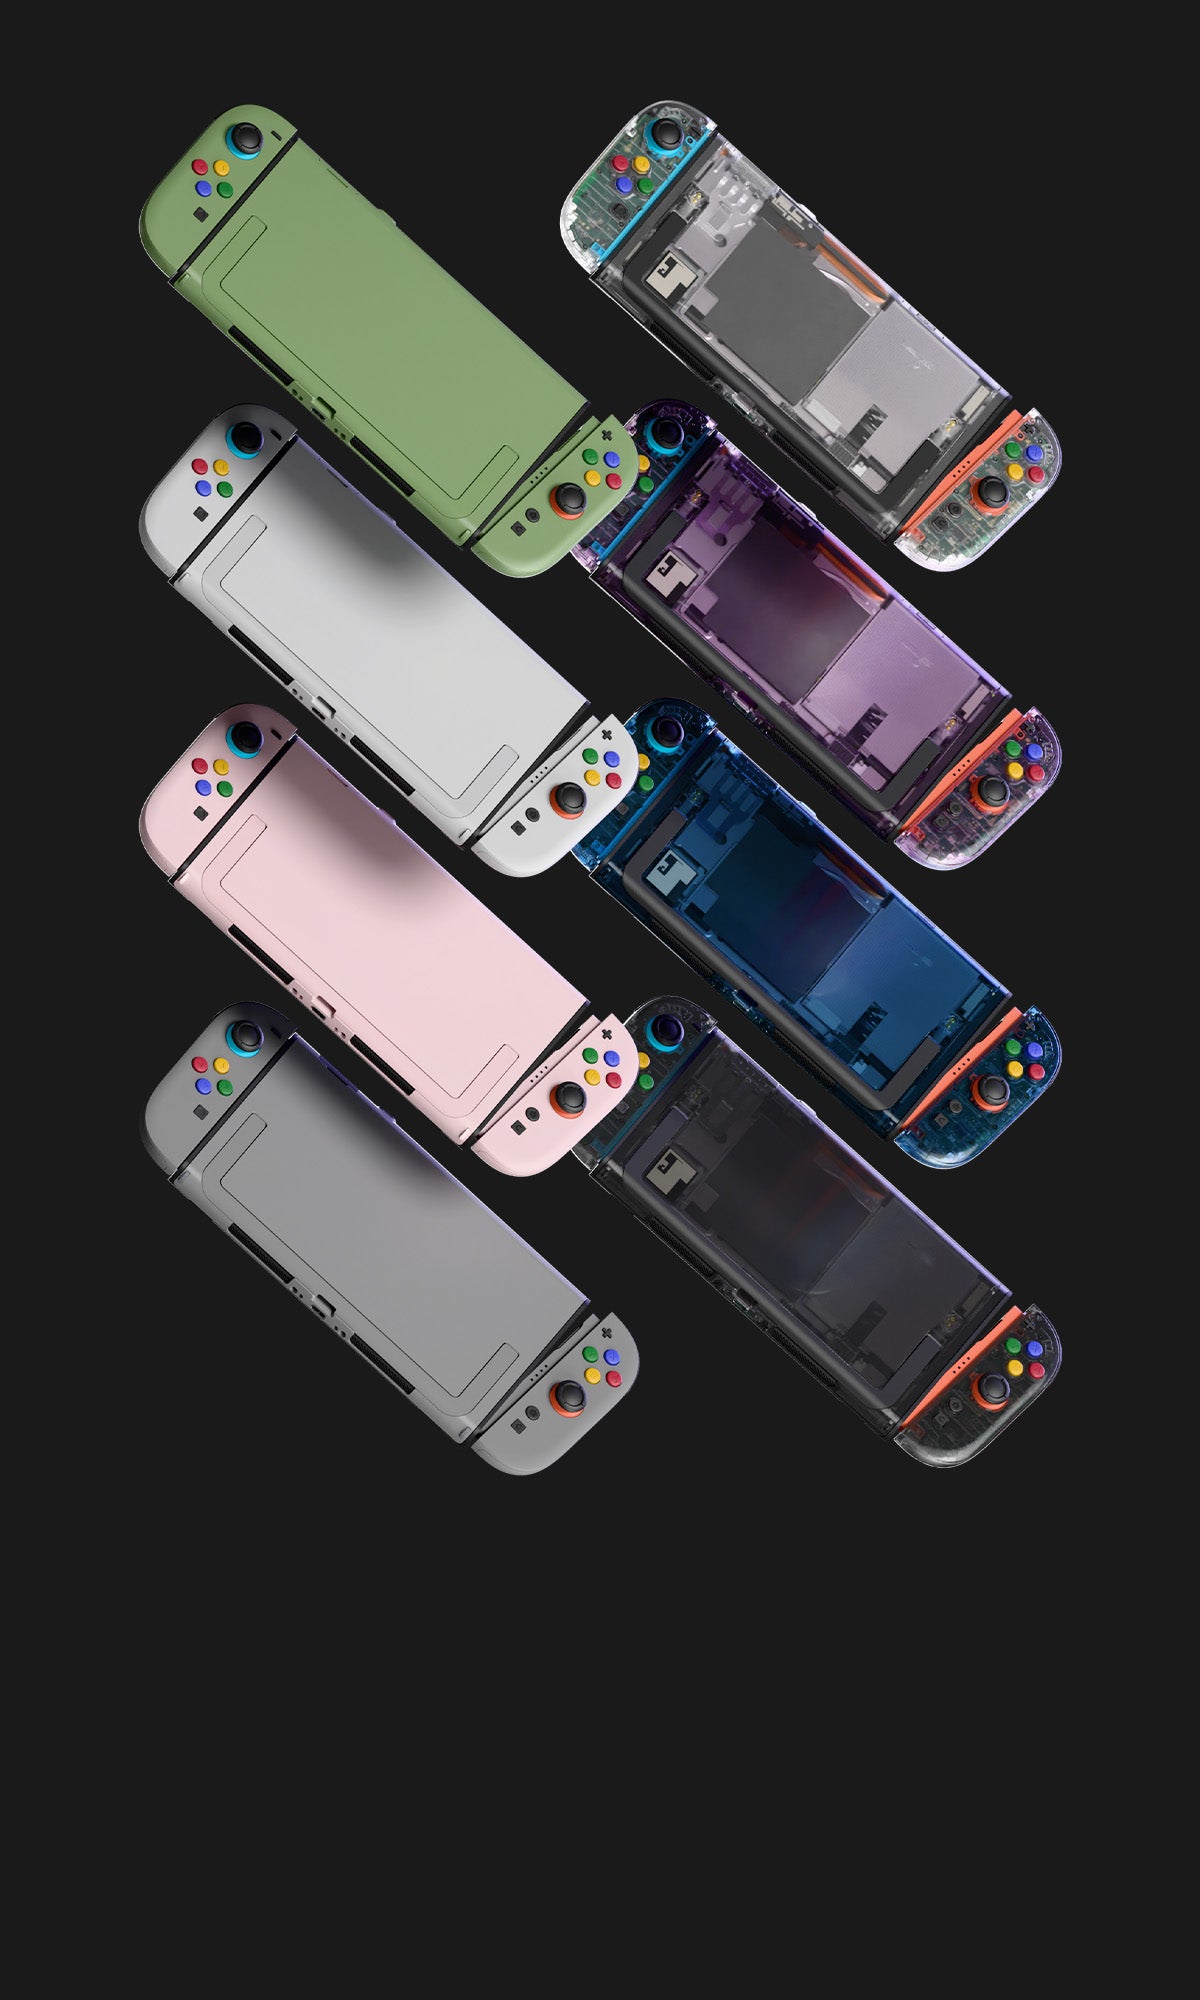
eXtremeRate DIY Replacement Full Set Shells with Buttons for Nintendo Switch 2 - Deluxe Version - Classic SwitchCube Style
Regular price $48.99Regular priceUnit price per -
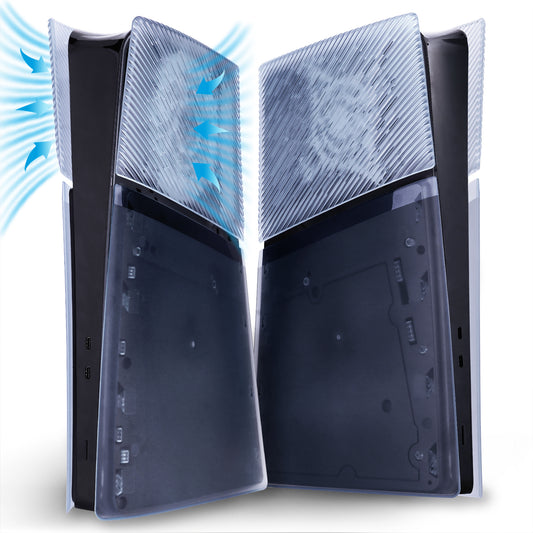
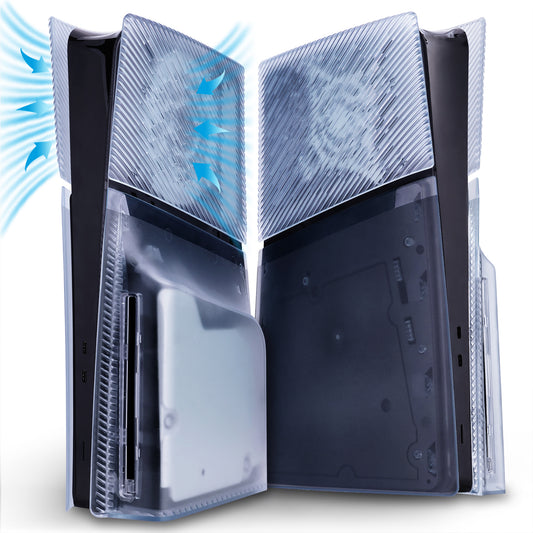
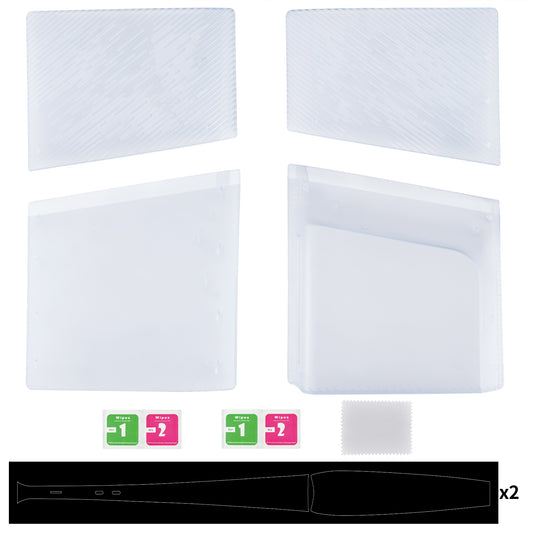
eXtremeRate eXcover Replacement Top Bottom Cover Side Panel with Cooling Vent for PS5 Slim Digital Edition Console - Clear Ice Blue
Regular price $39.99Regular priceUnit price per -
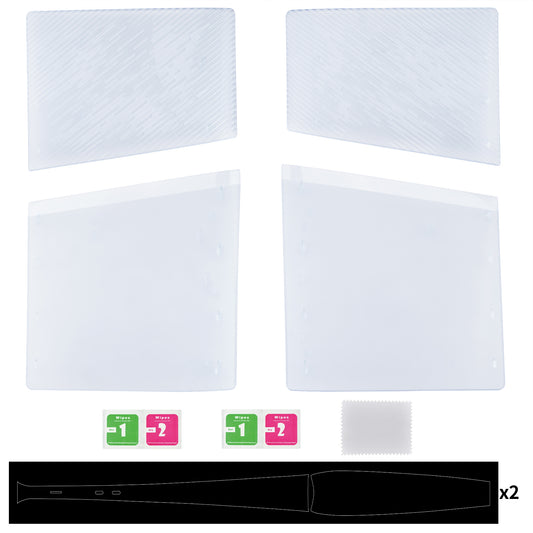
eXtremeRate eXcover Replacement Top Bottom Cover Side Panel with Cooling Vent for PS5 Slim Disc Edition Console - Clear Ice Blue
Regular price $39.99Regular priceUnit price per -
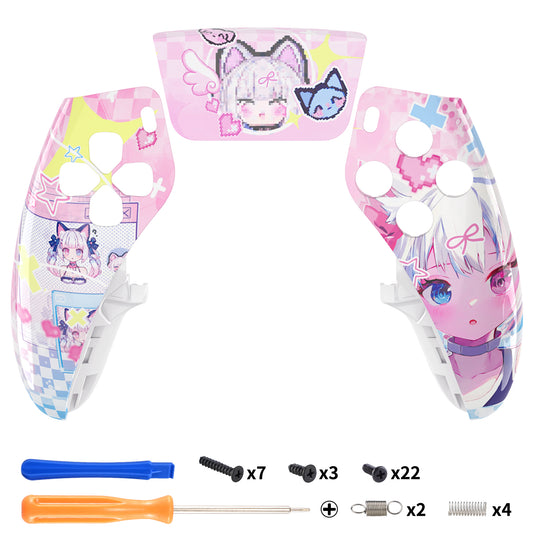
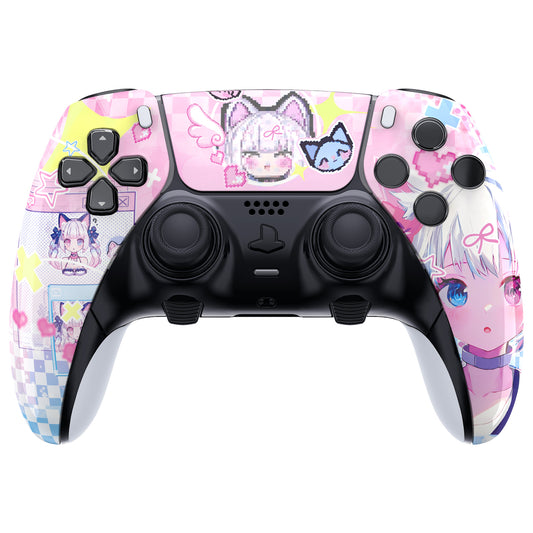
eXtremeRate Replacement Left Right Front Housing Shell with Touchpad Compatible with PS5 Edge Controller - MeWoow
Regular price $21.99Regular priceUnit price per$0.00Sale price $21.99Vendor:eXtremeRate -
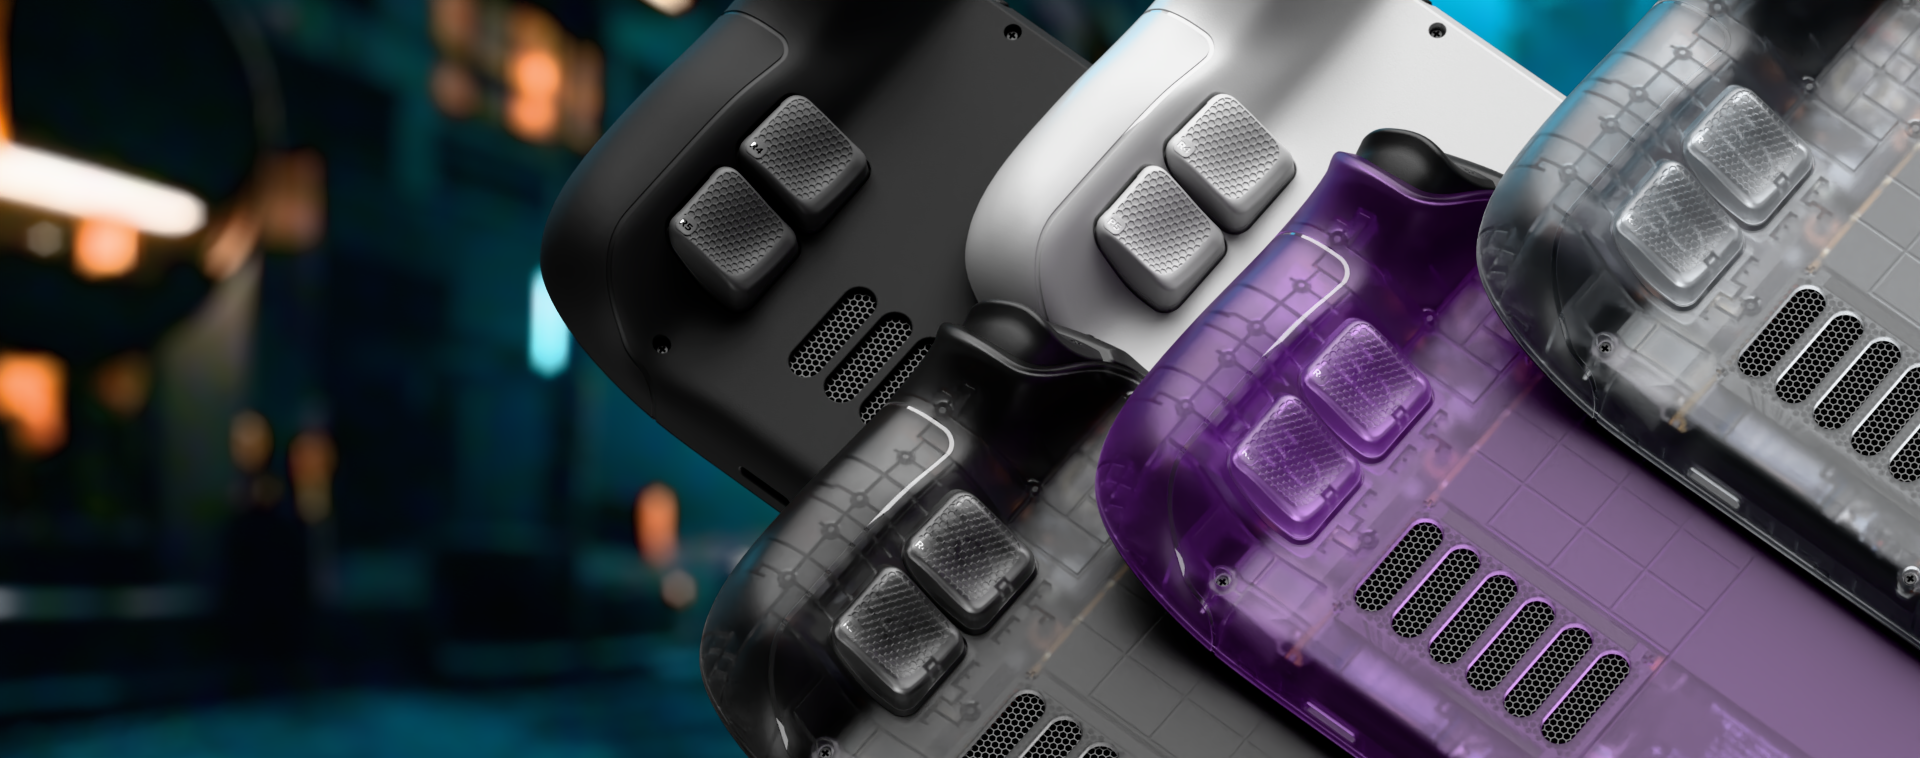
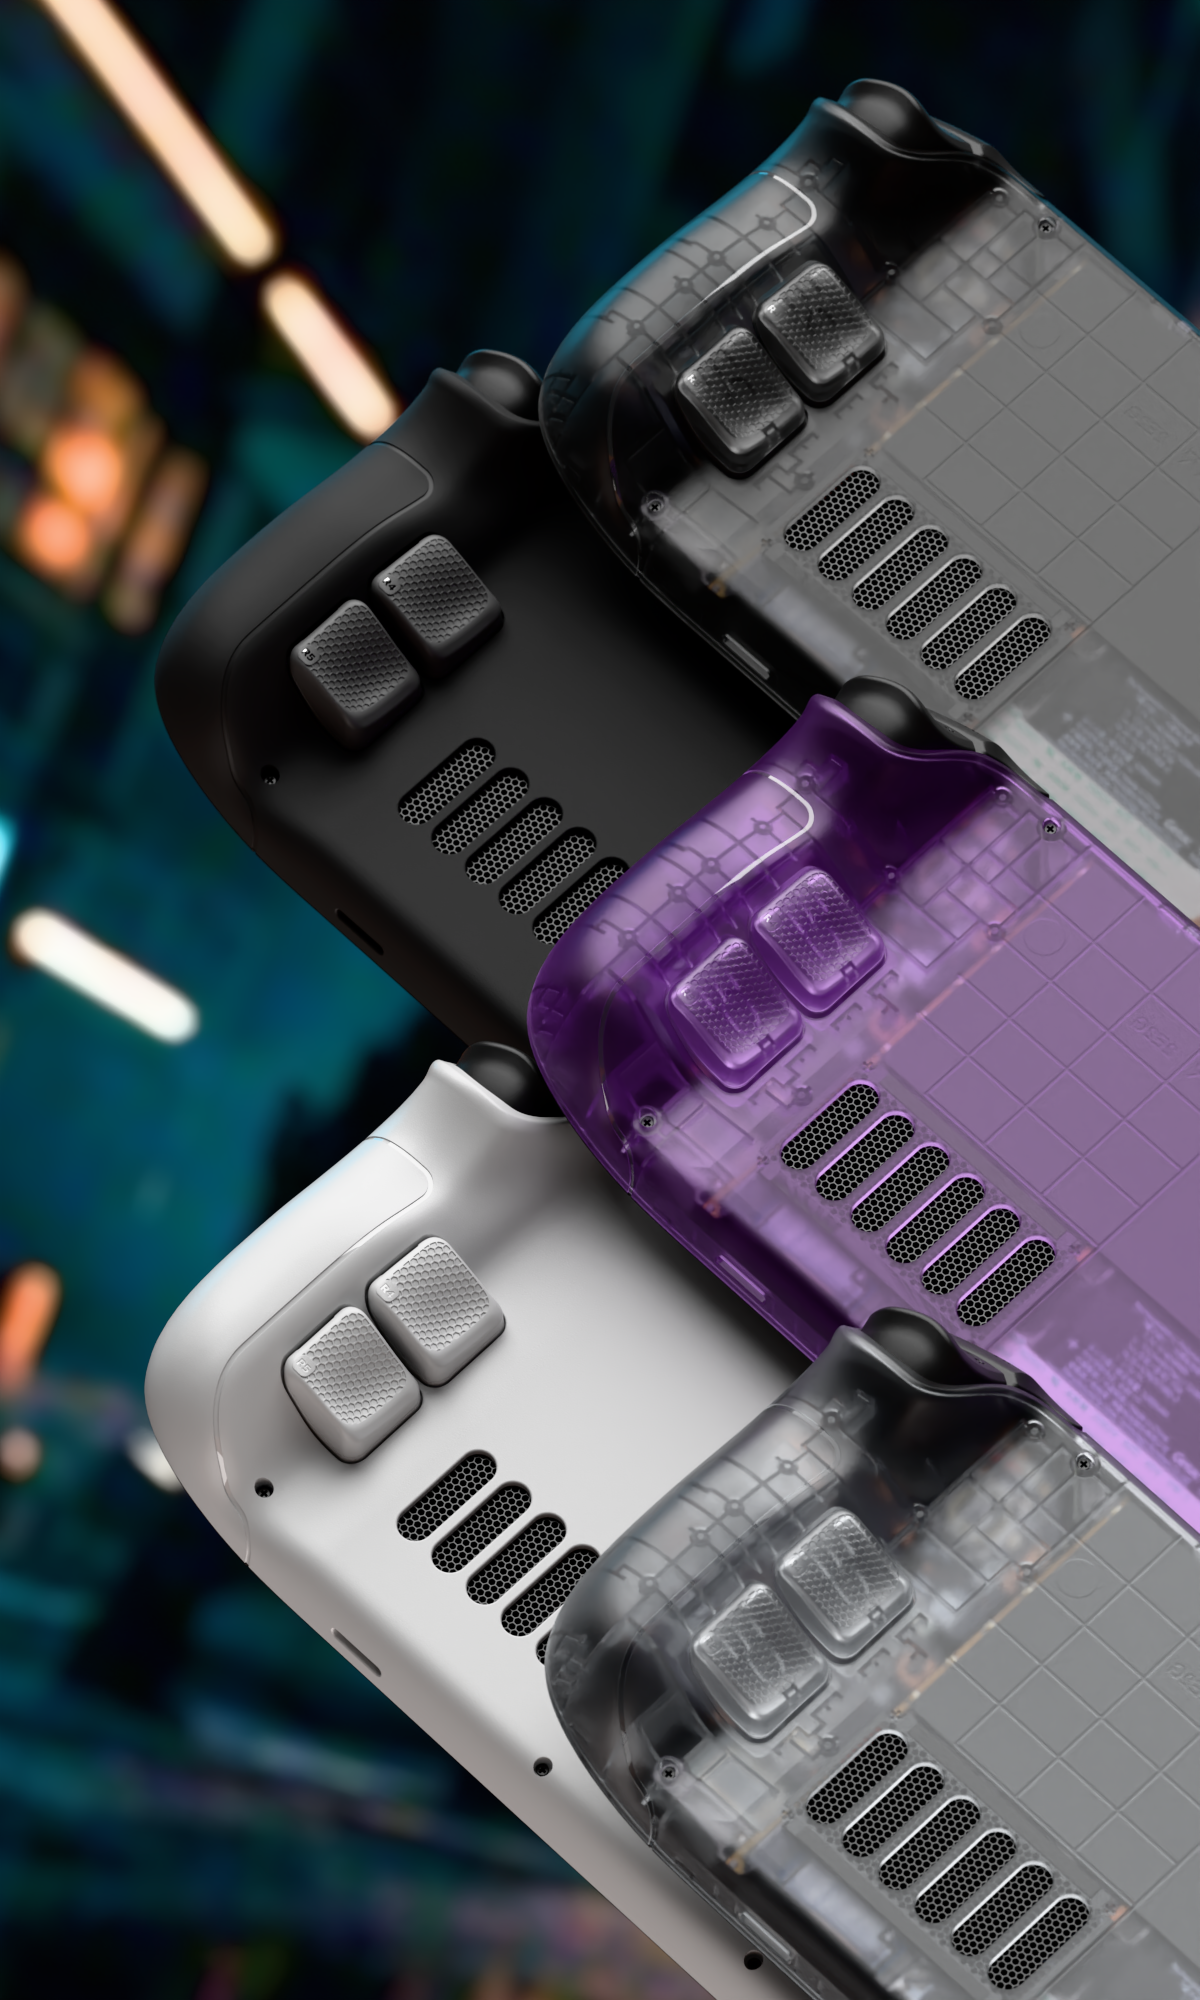
eXtremeRate Replacement DIY Rear Back Plate for Nintendo Switch 2 Handheld Console (Without Kickstand) - SFC SNES Classic EU Style
Regular price $25.99Regular priceUnit price per -
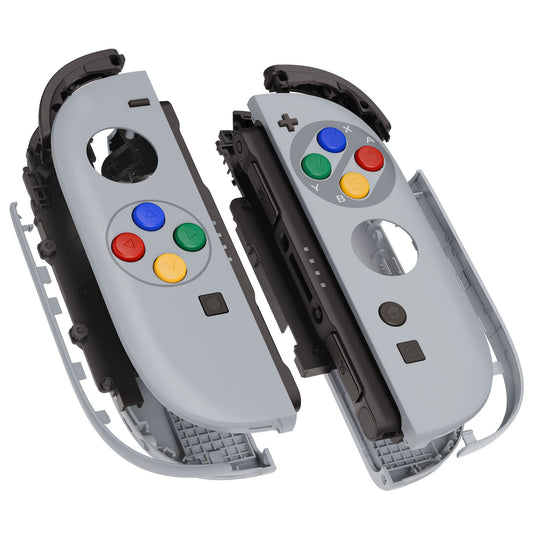
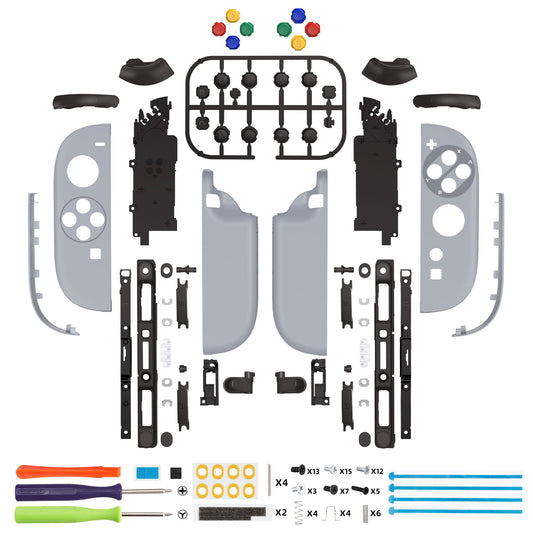
eXtremeRate DIY Replacement Full Set Shell Case with Buttons for Joycon 2 of Nintendo Switch 2 - Deluxe Version - SFC SNES Classic EU Style
Regular price $32.99Regular priceUnit price per -
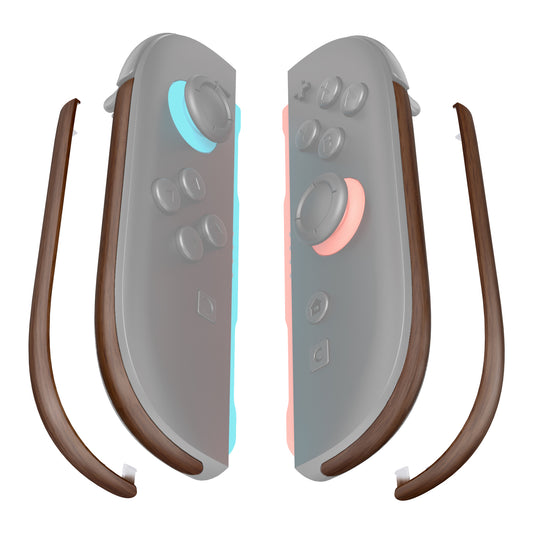
eXtremeRate Replacement Decorative Strips for Joycon 2 of Nintendo Switch 2 - Wood Grain
Regular price $9.99Regular priceUnit price per -
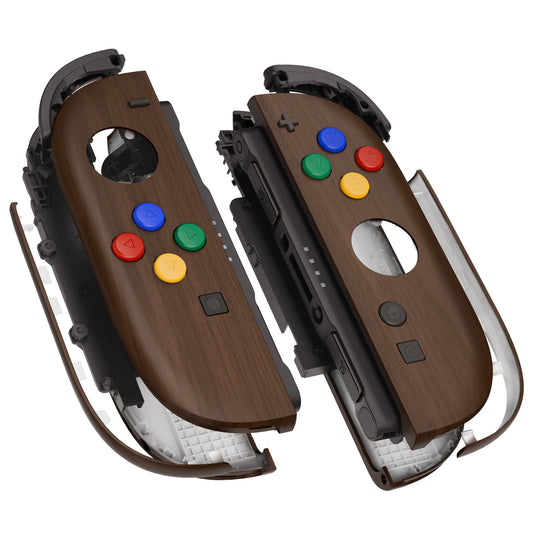
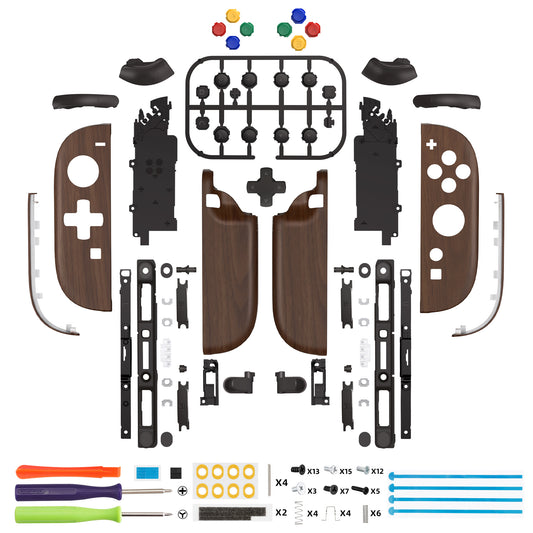
eXtremeRate DIY Replacement Full Set Shell Case with Buttons for Joycon 2 of Nintendo Switch 2 - Deluxe Version - Wood Grain
Regular price $32.99Regular priceUnit price per -
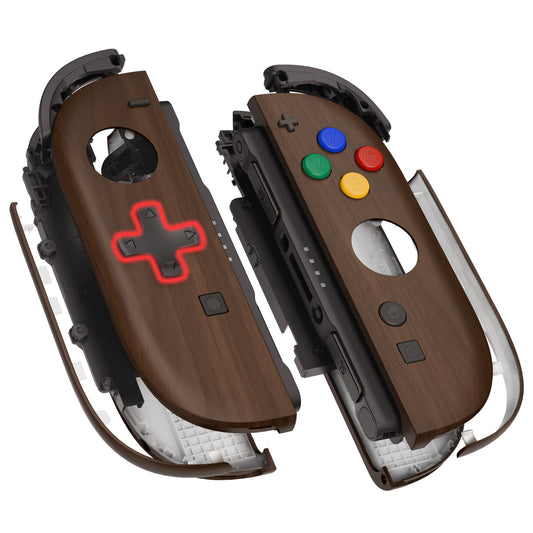
eXtremeRate D-Pad Version Replacement Full Set Shell Case with Buttons for Joycon 2 of Nintendo Switch 2 - Deluxe Version - Wood Grain
Regular price $32.99Regular priceUnit price per -
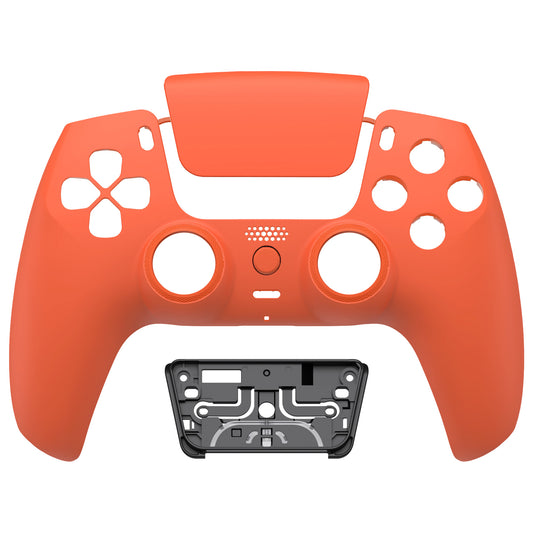
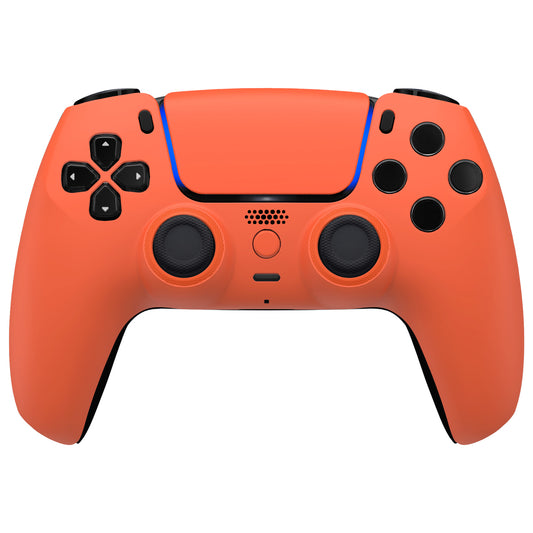
eXtremeRate LUNA Redesigned Replacement Front Shell with Touchpad Compatible with PS5 Controller BDM-010/020/030/040/050 - Orange
Regular price $20.99Regular priceUnit price per$0.00Sale price $20.99Vendor:eXtremeRate -
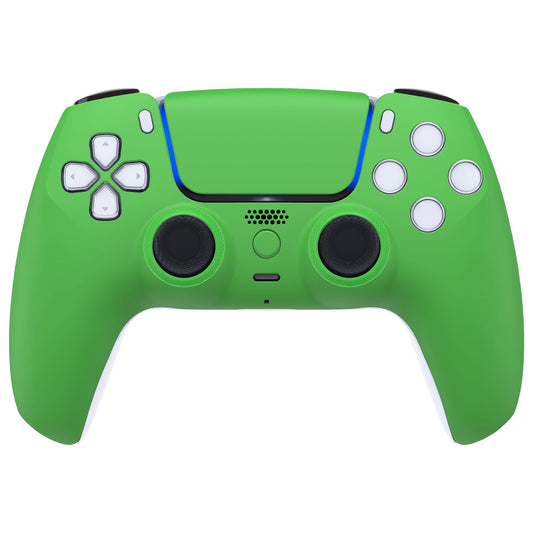
eXtremeRate LUNA Redesigned Replacement Front Shell with Touchpad Compatible with PS5 Controller BDM-010/020/030/040/050 - Green
Regular price $20.99Regular priceUnit price per$0.00Sale price $20.99Vendor:eXtremeRate -
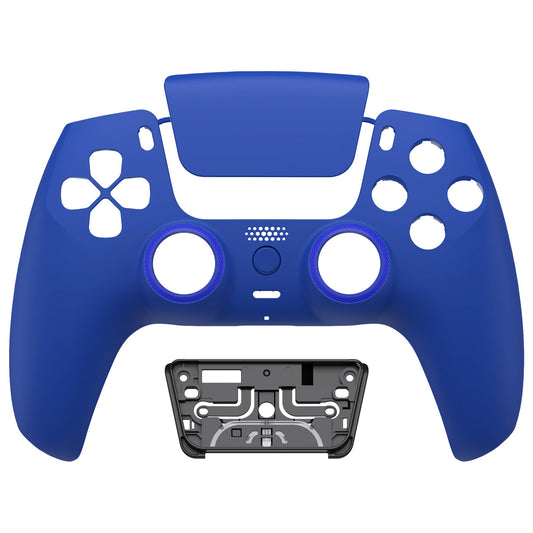
eXtremeRate LUNA Redesigned Replacement Front Shell with Touchpad Compatible with PS5 Controller BDM-010/020/030/040/050 - Blue
Regular price $20.99Regular priceUnit price per$0.00Sale price $20.99Vendor:eXtremeRate -
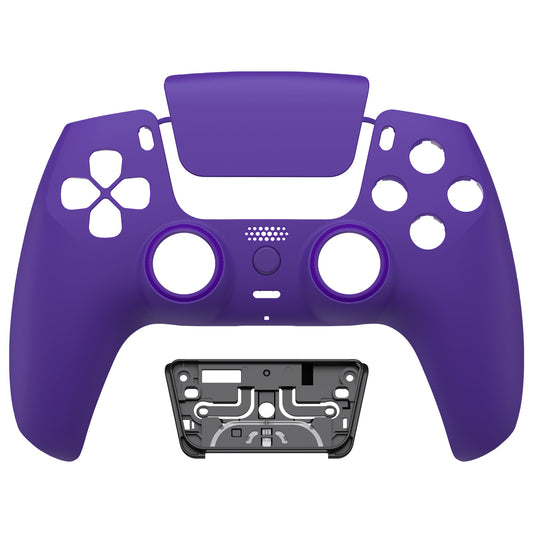
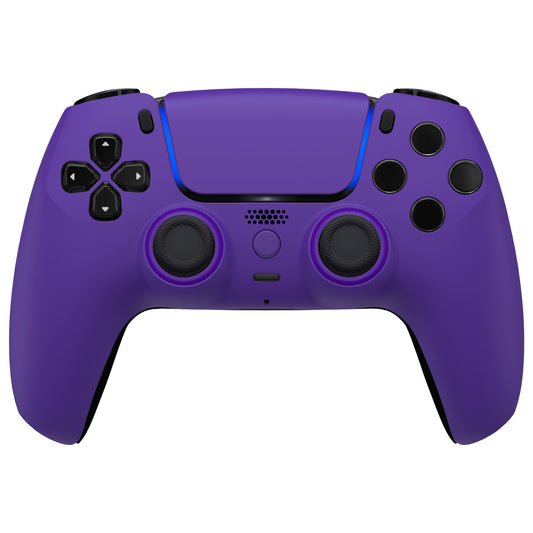
eXtremeRate LUNA Redesigned Replacement Front Shell with Touchpad Compatible with PS5 Controller BDM-010/020/030/040/050 - Purple
Regular price $20.99Regular priceUnit price per$0.00Sale price $20.99Vendor:eXtremeRate -
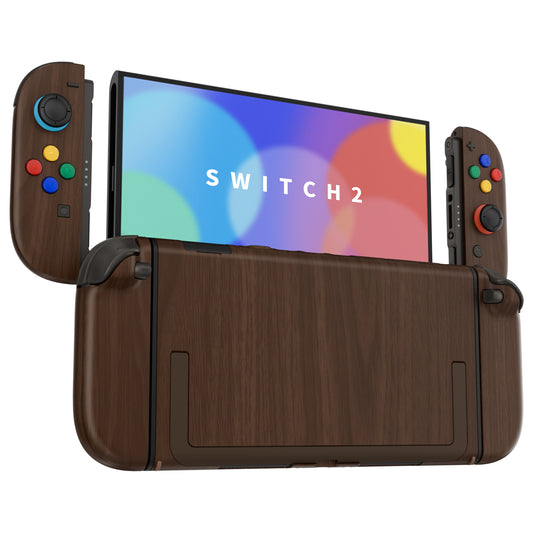
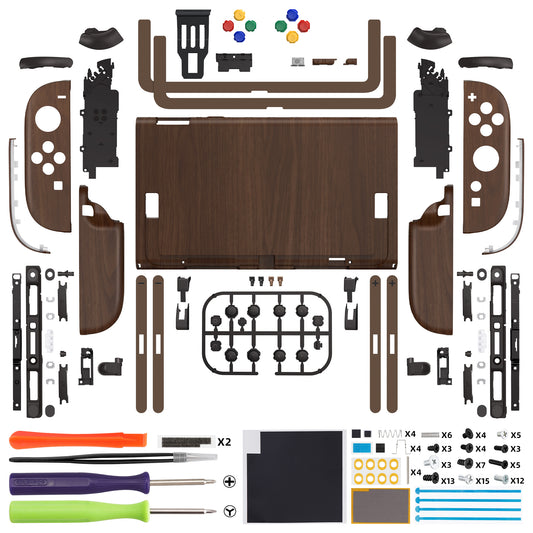
eXtremeRate DIY Replacement Full Set Shells with Buttons for Nintendo Switch 2 - Deluxe Version - Wood Grain
Regular price $48.99Regular priceUnit price per -
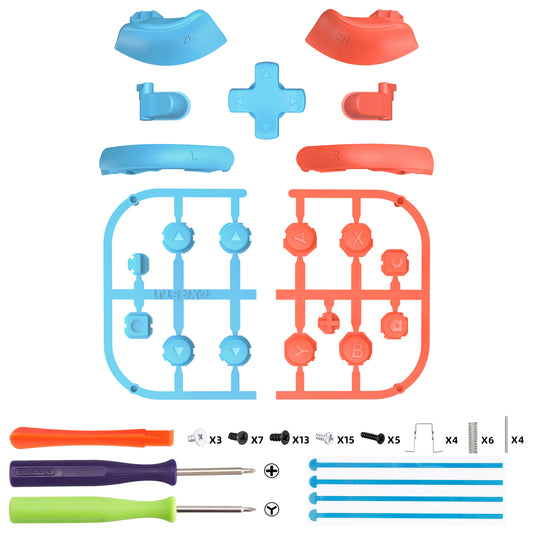
eXtremeRate DIY Replacement Full Set Buttons for Nintendo Switch 2 - Blue & Orange
Regular price $18.99Regular priceUnit price per